

Painting the outside of your home is no small task. When done incorrectly, painting your house can be a time-consuming endeavor that costs a lot of money and potentially damages your house’s siding or just makes it look bad. When done correctly, painting your house can be done quickly and easily and will make your house look great and improve your home’s aesthetic, curb appeal, and even value. In an effort to save you some time, money, and frustration, here are our tips on how to paint the exterior of your home.
STEP 1: CLEAN THE SURFACE
The first step for any paint job, indoor or out, should always be to make sure the surface you are painting is ready to be painted. The first step in doing that is to clean it and remove all dust, dirt, and other debris. The best way to clean the exterior of your house is to use a pressure washer. If you don’t have access to a pressure washer, you can use a hose to spray it down, though it won’t be as quick, easy, or effective.
As you clean the surface of your house, your two main goals are to remove large objects like spider webs, wasp nests, and other things, and to get rid of the dirt and dust that naturally accumulates on the outside of your home.
STEP 2: CAULK, PATCH, AND PRIME
This step is still focused on preparing the exterior of your home to be painted. It can be pretty tedious work, but if you take the time to do it well, you’ll thank yourself later when your paint isn’t chipping soon after you applied it! Walk around the exterior of your house, keeping a sharp eye out for any cracks in the walls or around joints — especially joints where one material meets another. Once you’ve caulked and patched your home’s exterior, prime it with the appropriate primer.
STEP 3: PICK YOUR PAINT
This might seem obvious, but you’re going to need to choose the paint you’ll be using before you paint your house. What might be less obvious, though, is what you’ll want to consider while choosing the paint you’ll be using. There are a few factors to consider, including:
- What quality of paint are you looking for?
- Which paints fit your budget?
- Which colors are best for curb appeal?
- Which colors will fit well with the aesthetic of your house?
- Are there restrictions on paint colors in your area?
- How long will the paint last?
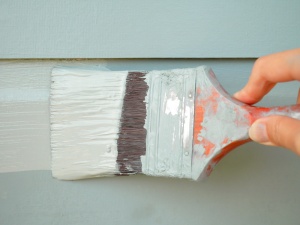
STEP 4: PAINT IT
Congratulations! With some hard work and determination, you’ve made it past the not-so-fun parts and are ready to start painting your home. You are free to paint your house in any way that you feel is best, but here are some of our tips and tricks for making it go smoothly.
- Mix your paints together. If you have purchased multiple cans of the same color of paint, we advise that you combine them all in a five-gallon bucket or another place. This will ensure that the color remains consistent across the whole house and eliminate the possibility of one area being a slightly different shade than the others.
- Cover your windows, drains, vents, and other exterior elements with tape and plastic. As you know, paint is much easier to apply than it is to remove. Before you paint, you’ll want to make sure to protect everything you don’t want to get paint on.
- Use the “spray and roll” method to save time. If your budget allows, get a paint sprayer and someone to help you. Have one person spray the house and the other roll what has been sprayed, applying an even coat. This method will save you quite a bit of time and it will look nice.
- Paint from the top down. Most experienced painters have a habit of painting from the top down. This is because paint has a tendency to drip and painting from the top down allows the painter to smooth over the drips as they go instead of having the drips ruin what has already been painted.
- Apply two coats. Applying the second coat of paint will give your house a more even finish and help the paint last longer than if only one coat is applied. Not everybody has the means to apply two coats, so if you can’t, don’t sweat it. Your house will still look great and the paint, when properly cared for, will last for years to come!
STEP 5: DETAILS, DETAILS, DETAILS
Once the exterior of your house has received a new coat of paint, you’ll want to paint the decorative details to match it. This will complete the look and make your house look good as new. Using a small brush or roller, paint the doors, shutters, molding, and other decorative details to complete your exterior paint job.
STEP 6: CELEBRATE A JOB WELL DONE
If you’ve made it this far, you’ve achieved a pretty spectacular accomplishment. There is a lot to be said for finishing a large project like this, so once you’ve finished, take some time to step back and admire your “new” home. Great work!

- When Do I Need to Replace My Rain Gutters? - May 20, 2024
- Getting Your Rain Gutters Ready For Spring - April 22, 2024
- Why James Hardie Siding Is Perfect For Your Home - March 26, 2024