
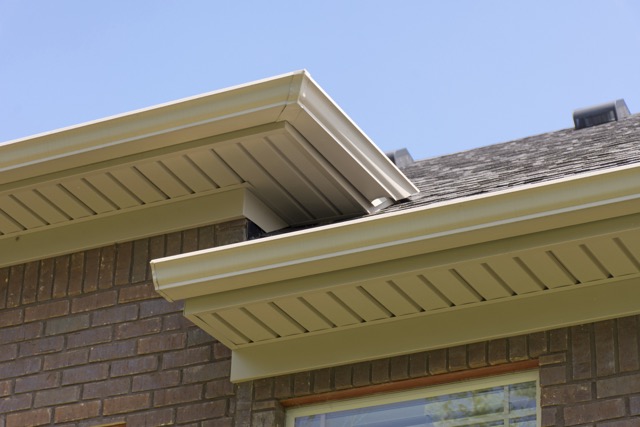
Your roof will frequently extend over the walls of your home due to need. The eaves of your house or the rafters of your roof are two names for this overhang. When the underside of this overhang is finished, it is known as the soffit, which literally means “something attached beneath.” Soffits are a crucial part of your roof’s rafters, serving a variety of purposes ranging from aesthetics to helping you save money on your electricity costs.
The function of a soffit
Your attic’s soffit functions as a passive ventilation unit. It prevents heated moisture in the air from condensing and forming mold in the attic. The soffit that runs along the roofline provides continuous ventilation and is one of the most efficient ways to air the attic. Heat and moisture are drawn away from the home by air cycling from the soffit to the vents. The soffit also prevents pests from entering your property via the roofline or gutters and establishing a nest in your attic. Animals may wreak havoc on your roof and electrical systems, not to mention contribute to poor air quality.
Types of soffit
- Steel soffits are long-lasting and available in a number of colors. It is an outstanding, cost-effective energy-saving method for residential ventilation and air-conditioning systems.
- Fibre Cement is the least popular soffit material, but it is advantageous to use since it is available in straight-grain and cross-grain wood textures, which are nothing more than wood fibres impacting look and consistency. It’s light, and it protects the building from weather fluctuations.
- Soffits made of wood come in a variety of colors. It may be used in practically any setting and is also recyclable. It protects a structure’s roof from all types of weather.
- Vinyl soffits are inexpensive. Water, rot, cracking, and chipping are all prevented. Homeowners and builders are not required to keep it up all of the time. In terms of insulation and energy consumption, it is effective.
- Aluminum soffits are malleable and easy to work with. They are simple to clean since they do not collect dirt. This soffit material is simple to work with. It’s water-repellent. It is rot-resistant, crack-resistant, and chip-resistant. It acts as a moisture barrier. It is not difficult to set up. High flames and fumes are not tolerated by the material. It doesn’t need a lot of upkeep.
- Unplasticized polyvinyl chloride soffits are known as UPVC soffits. It is resistant to water, as well as cracking, rotting, and chipping. It performs admirably in the face of severe downpours. Solid, vented, and hollow are the three different varieties. Solid is the most frequent variety since it is the most cost-effective.
How to install soffit
- Calculate the total square footage required for the soffit-required regions. Panels are available in 12-foot lengths and 12 or 16-inch widths. To accommodate waste and overlaps, purchase enough soffit to cover about 5% more space than is required.
- Examine the surfaces for uniformity and straightness. Any loose boards or shingles that may have hampered your installation process should be reattached. Any existing trim should be removed. Identify any potential obstacles, such as utility wires. You can trim panels to fit around them, or call your utility company to have them removed or replaced. Guttering should be removed. This can be time-consuming and difficult to accomplish without causing damage to the gutters. This technique goes significantly faster if you want to replace the gutters anyhow and aren’t concerned about harming the existing ones.
- F-or J-channels can be used as receiving channels, and they should be fastened to the wall with nails every 12 inches. When the soffit bends around a corner, the channel must be constructed with a 1/4-inch gap to allow for wall expansion. Fasteners should not be overdriven.
- Soffit panels must be trimmed to the necessary length to fit the area being covered. Allow for movement by subtracting half an inch from the distance between the wall and the fascia. Cut the panels to the specified dimensions. The ideal tool is a circular saw, and you may cut two panels at once to speed up the process.
- Each panel should be installed one at a time. In the channel, place the soffit panel. Make sure the panel meets the wall at a 90-degree angle. Fix the panel in place. For each panel, repeat these instructions. Make sure the tongues and grooves of each panel match the tongues and grooves of the panels next to them.
- Apply utility trim and secure with trim nails once all the panels have been placed.

- When Do I Need to Replace My Rain Gutters? - May 20, 2024
- Getting Your Rain Gutters Ready For Spring - April 22, 2024
- Why James Hardie Siding Is Perfect For Your Home - March 26, 2024